
First let me apologise but I seem to have spent the last few days messing around on my site and trying to change things and forgetting about writing for my blog. I have been baking too and taking photos so I do have plenty to add.
This is a post about a Pinata Birthday Cake which I made for my daughter many months ago. I have shared this recipe on my recipe of the week page before but never my ideas about how to change it and I wanted to add to my cake recipes on my recipe page. As I have another recipe for my other daughter’s cake to share soon I seem to gone into birthday mode.
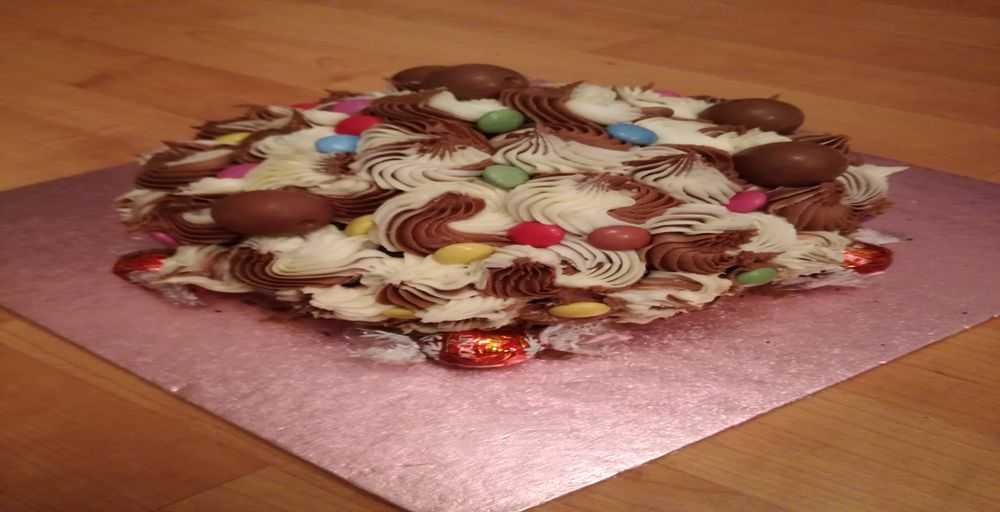
The children and their friends really enjoyed this cake and I gave my daughter the choice of sweets for filling and decorating the cake so they did have some input but I did have the final say as the idea was in my head to start with. I find that when have a cake to make I tend to dream about how I am going to decorate the cake before I make it and when I actually make it I don’t tend to stray far from my dream.
Pinata Birthday Cake Recipe
Course: Cakes, traybakes and cake decorating, RecipesCuisine: cakes, birthday cakeDifficulty: Intermediate10
servings45
minutes30
minutes598
kcal1
hour15
minutesA lovely surprise inside of this birthday cake.
Ingredients
For the sponges:
8oz self raising flour
2oz cocoa
6oz dark brown sugar
4oz caster sugar
10oz soft spread
5 eggs
For the buttercream:
8oz icing sugar
3oz soft spread
2oz cocoa
Lots of sweets
Directions
- For the sponges:
- Preheat the oven to Gas 4.
- Oil a giant cupcake mould really well and place on a baking tray.
- In a mixing bowl, weigh out the ingredients for the cake.
- Using an electric whisk, mix the ingredients until a smooth batter is formed.
- Transfer to the silicone mould.
- Bake for 25-30 minutes till well risen and springs back when touched.
- Allow to cool before removing from moulds.
- For the buttercream:
- In a mixing bowl, cream together the icing sugar and soft spread until a smooth buttercream is formed.
- Transfer half of the buttercream to a piping bag with nozzle ensuring the buttercream lies on one side of the bag.
- With the reminder of the buttercream mix in the cocoa.
- Transfer this chocolate buttercream to another piping bag with the end cut off and place inside the other bag.
- Make sure that both buttercreams pipe out of the bags at the same time to create a swirl effect.
- Take the base of the cake and scoop out some of the centre to make room for sweets.
- Fill up the centre of the base before placing on the lid.
- Pipe the buttercream on the cake to decorate and finish off with more sweets.
Notes
- Nutritionally, one slice of this cake contains 598 calories, 32.9g total fat (42% daily total fat), 74.3g total carbohydrate (27% daily total carbohydrate), 4g fibre (14% daily fibre) (based on a 2000 calorie diet).
Equipment Needed:
The main equipment needed to make one of these cakes is a silicone giant cupcake mould, electric whisk, piping bags and star nozzle. I use a silicone mould rather than a metal mould as I feel the cake is easier to remove from the mould once it is baked. This is my personal preference though. I use a handheld electric whisk when the bake I am making is only small but for larger batch baking I use my standing mixer. Gone are the days of making a cake by the creaming method and folding in the flour as I now use the all-in-one method for my cake making.
Changes which can be made to this recipe:
There are many different dietary requirements which can be altered in recipes to make them more suitable for different consumers. In this recipe you could use gluten free flour instead of standard flour which will remove the risk of wheat and gluten allergens. Also, you could replace the eggs with an egg replacer, for example orgran and this will make the cake more suitable for egg allergy sufferers. Finally, the chocolate used in the filling of the centre of the cake can be lactose free so as to remove the risk of milk allergen.
What next for Love-to-bake.uk….
My recipe books have been selling well over the last few days and I am putting it down to the free book and half price offer I had on two of my books. I want to say a big thank you to those who have bought a book and it would be really great if you would leave a review at Amazon in the near future. My Halloween book is nearly finished just a few more tweaks and it should be ready for publication.
At the moment, I am working on some new ideas for my webshop which is starting to produce orders for delivery on line which is exactly what I hoped would happen. I have some new ideas to add to the products available so I am trying to get those added soon.
I have been baking the last few days and I do have photos to share but I will save them for another day. Something savoury is on the cards for tomorrow though.
Finally, I have been trying a new page builder on my blog but I am still in the trial period so bare with me if things start to go wrong – it is just me messing around with something that doesn’t need fixed but I may change eventually.